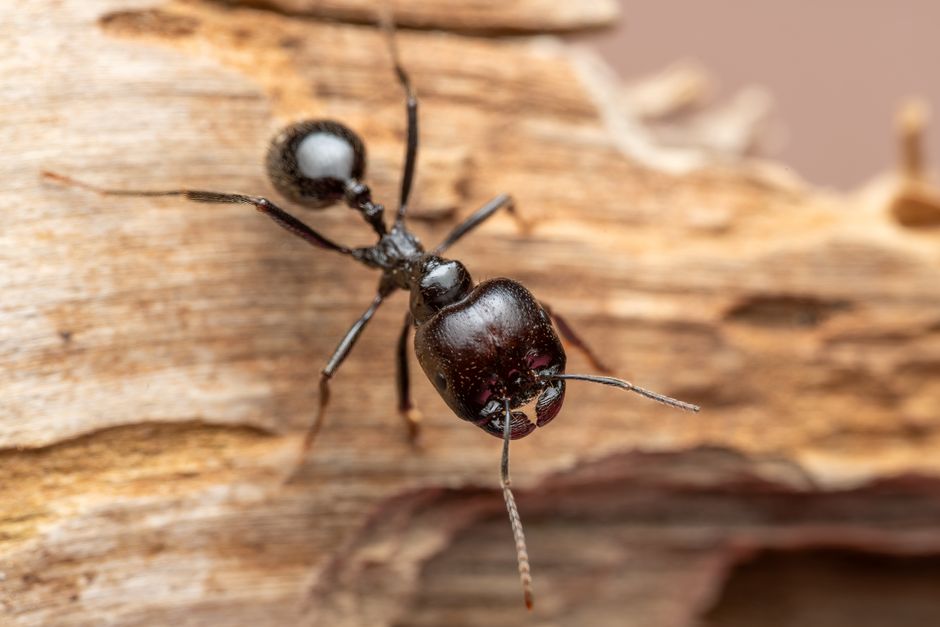
The Real Cost of Ignoring Carpenter Ant Prevention This Summer
If you want to prevent carpenter ant infestation in your Massachusetts home, here is what works:
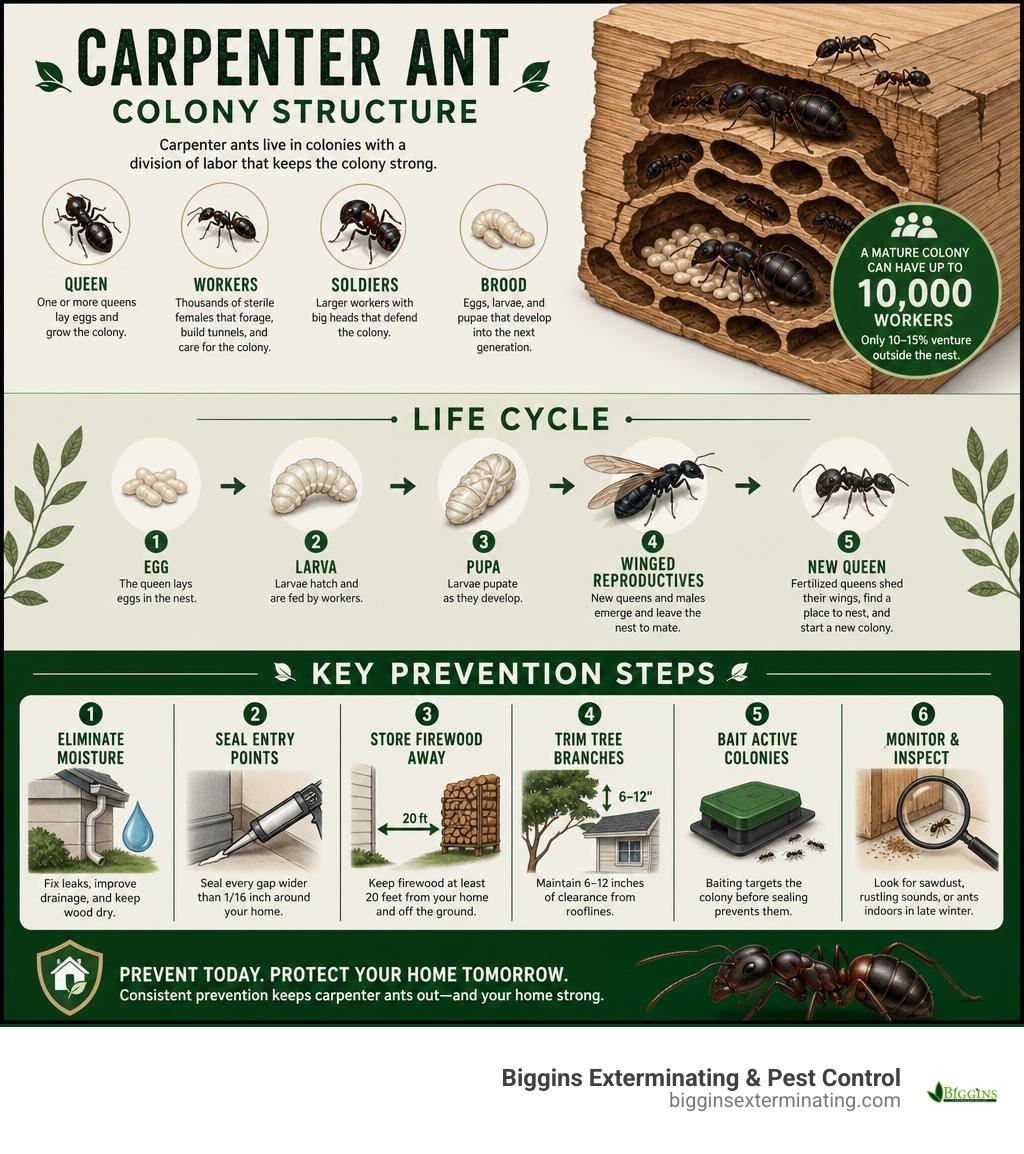
- Fix moisture problems first — damp or decaying wood is the #1 attractant
- Seal every gap wider than 1/16 inch around your foundation, doors, windows, and utility lines
- Store firewood at least 20 feet away from your home, elevated off the ground
- Trim tree branches to keep at least 6–12 inches of clearance from your roofline
- Bait active colonies before sealing — trapping ants inside walls makes things worse
- Call a professional if you see sawdust-like debris, hear rustling in walls, or spot ants indoors in late winter
Carpenter ants are not just a nuisance. They silently hollow out the wood in your walls, floors, and framing — and by the time most homeowners notice the damage, a colony may have been active for years.
In Massachusetts, summer is peak season. Colonies become most active from April through October, with foraging workers emerging around dusk and following the same chemical trails night after night. A single mature colony can hold up to 10,000 workers, yet only 10–15% of them ever venture outside the nest. That means what you see is a small fraction of the actual problem.
What makes carpenter ants especially frustrating is how easy it is to treat symptoms while missing the root cause. Homeowners spray the ants they can see, seal a crack or two, and assume the problem is solved — only to find ants again three weeks later.
I’m Stephen Biggins, owner of Biggins Exterminating & Pest Control, a family-owned company serving Wilmington, MA and surrounding communities since 1982. Over four decades of hands-on work across Massachusetts homes has shown me that the most effective way to prevent carpenter ant infestation is to eliminate moisture, seal access points correctly, and target the colony — not just the foragers. This guide walks you through exactly how to do that.
Key prevent carpenter ant infestation vocabulary:
Why Carpenter Ants Target Massachusetts Homes

Carpenter ants do not actually eat wood. Unlike termites, which consume cellulose for nutrition, carpenter ants simply excavate wood to build galleries for their nests. However, their physical tunneling can cause identical structural devastation over time. To effectively prevent carpenter ant infestation, we must first understand why they choose certain homes over others.
These pests are highly structured. Their biological network relies on a division between parent nests and satellite nests:
- The Parent Nest: This is almost always located outdoors in high-moisture environments like rotting tree stumps, decaying logs, or old woodpiles. This is where the queen resides, laying eggs and maintaining the core population. A queen can live up to 25 years, meaning a parent colony can plague a neighborhood for decades if left undisturbed.
- Satellite Nests: When the parent colony matures—typically around 6 to 10 years of age with a population exceeding 2,000 workers—it begins establishing satellite nests. These are often located indoors. Because satellite nests do not contain eggs (only workers, mature larvae, and pupae), they do not require the constant, extreme humidity that the queen needs. This allows them to thrive in drier wall voids, hollow-core doors, and foam insulation.
When searching for a nesting site, carpenter ants follow the path of least resistance. Dry wood is incredibly dense and difficult for a worker ant to chew. However, wood that has been subjected to water damage, leaks, or poor ventilation becomes soft, fibrous, and easy to hollow out.
If you suspect you have these destructive pests nesting in your home, learning how to find carpenter ant nest locations is your first line of defense. It is also vital to know what you are dealing with; you can learn the differences in nesting and damage by reviewing the 5 key differences carpenter ants vs termites. For general information on their biology, you can also consult the resource page on Carpenter ants – Canada.ca.
Identifying Hidden Moisture Hotspots
Moisture is the single biggest “unlock” condition for a carpenter ant invasion. Wood moisture levels at or above 19% allow wood-decaying fungi to grow, softening the wood fibers and issuing a chemical “open house” invitation to nearby foraging ants.
To prevent them from taking hold, you must act like a detective and inspect these common moisture hotspots:
- Roof Flashing and Chimneys: Damaged flashing allows rainwater to seep behind fascia boards and down into the attic joists.
- Window and Door Sills: Rainwater pooling on poorly sloped sills eventually rots the structural framing underneath.
- Plumbing Voids and AC Condensation Lines: Slow drips behind bathroom tiles, under kitchen sinks, or from air conditioning lines can keep wall cavities damp for months without showing visible drywall stains.
- Basements and Crawl Spaces: Earth-to-wood contact, high humidity, and poor ventilation create the perfect environment for wood decay.
For a deeper dive into the relationship between water and wood-boring pests, check out the detailed guide on Moisture Carpenter Ants: Stop Them Now | Carpenter Ant Guide. If you suspect they are already nesting in your home, you may want to read about managing a carpenter ant infestation in house settings.
Foraging Behavior vs. Nesting Inside Walls
It is common to spot a single large, black ant wandering across your kitchen counter. But does a single ant mean you have a structural emergency? Not necessarily.
Carpenter ants are exceptional foragers. They can travel up to 100 yards (300 feet) from their parent nest in search of food. They are nocturnal, emerging from their nests roughly 15 minutes after sunset, with peak activity occurring between dusk and midnight. If you only see one or two ants occasionally during the spring or summer, they may just be outdoor foragers looking for sweet honeydew, proteins, or household spills.
However, if you observe the following signs, you likely have an active nest inside your walls:
- Frass Piles: Carpenter ants push their waste out of small slit-like openings in the wood. This “frass” looks like fine sawdust but contains wood shavings, dirt, and tiny fragments of dead insects.
- Rustling Sounds: When a nest is disturbed, the ants click their mandibles together, producing a dry, rustling sound inside the wall voids. You can sometimes hear this at night by pressing your ear (or a glass) against the wall.
- Winged Swarmers: Finding winged reproductive ants indoors during late winter or early spring is a definitive sign of an indoor nest. These “swarmers” are sent out by mature colonies to mate and establish new nests. You can learn more about these winged reproductives and their behavior by reading do carpenter ants have wings.
How to Prevent Carpenter Ant Infestation in Your Home

Creating a physical barrier is the most reliable way to prevent carpenter ant infestation over the long term. This approach, known as pest exclusion, focuses on eliminating the structural gaps that allow ants to transition from outdoor foraging paths to indoor nesting sites.
To build an effective defense, you should consult a comprehensive overview of exclusion techniques, such as the carpenter ant prevention ultimate guide. For scientific backing on their habits and nesting preferences, the Carpenter Ants | Colorado State University Extension guide provides excellent academic insights.
Landscaping Adjustments to Prevent Carpenter Ant Infestation
Your yard is the launchpad for indoor infestations. By managing your vegetation and outdoor wood storage, you can significantly reduce the risk of ants bridging the gap to your home:
- Trim Tree Branches and Shrubs: Ants frequently use overhanging branches as natural highway systems to bypass foundation treatments and crawl directly onto your roof, siding, or gutters. Keep all branches trimmed back at least 6 to 12 inches from your home’s exterior.
- Manage Mulch Smartly: While mulch keeps your garden looking beautiful, it also retains moisture and provides a cozy shelter for foraging pests. Keep wood mulch at least 12 to 18 inches away from your foundation wall, replacing that immediate border with crushed stone or gravel.
- Store Firewood Correctly: Never stack firewood against your house or inside your garage. Firewood should be stored at least 20 feet away from your home, raised at least 5 inches off the ground on a metal rack or pallets to allow air circulation. Only bring in firewood that you plan to burn immediately, as warming logs can wake up dormant ants inside.
- Eliminate Old Stumps: Rotting tree stumps and dead roots are the absolute favorite nesting grounds for parent colonies. Grind down and remove stumps within 100 feet of your home.
For homeowners in our local service areas, you can find regional tips on landscaping defenses in wood you believe it stopping carpenter ants in bedford ma.
Why You Must Bait and Kill Colonies Before You Prevent Carpenter Ant Infestation
One of the most common—and costly—DIY mistakes is sealing up cracks while an active colony is still living inside the walls.
If you block their primary exit points without killing the nest first, you trap the ants inside. Panicked, they will begin chewing new tunnels through your sound, dry structural wood, drywall, and insulation to find a new way out. This can cause more damage in a single week than they would have normally caused in a year.
Always follow this order of operations: Bait first, seal second.
Using slow-acting gel baits is highly effective because they exploit the ants’ natural food-sharing habits. Foraging workers ingest the bait and carry it back to the hidden satellite or parent nest, sharing it with the larvae and the queen.
To ensure you are using the right baiting strategy, read our carpenter ant baits complete guide and find the best carpenter ant bait for indoor and outdoor control to eliminate the colony before you begin sealing.
Sealing Structural Entry Points and Choosing the Right Materials
Once the active colony has been eliminated, it is time to seal the physical pathways. Any gap wider than 1/16 of an inch is large enough for a worker carpenter ant to squeeze through.
To help you choose the right materials for your sealing project, refer to the comparison table below:
| Sealant Type | Best Use Case | Pros | Cons |
|---|---|---|---|
| 100% Silicone Caulk | Joints, window frames, door trim, glass-to-frame seals | Highly flexible, waterproof, long-lasting, ants cannot chew through it | Cannot be painted over, requires solvent for cleanup |
| Polyurethane Sealant | Masonry-to-wood joints, concrete cracks, sill plates | Extremely durable, paintable, excellent adhesion to rough materials | Slow cure time, difficult to tool smoothly |
| Acrylic Latex Caulk | Interior baseboards, dry indoor trim | Easy to apply, paintable, water cleanup | Shrinks over time, brittle, ants can easily chew through it |
| Expanding Polyurethane Foam | Large wall voids, pipe penetrations (must cap with silicone) | Fills large gaps quickly, insulates | Ants can easily tunnel through it if not capped |
To design a complete exclusion layout for your home, review the step-by-step instructions in Carpenter Ant Entry Points? Seal Them! | Carpenter Ant Guide.
The Best Sealants for Ant Exclusion
For exterior exclusion, 100% silicone caulk and polyurethane sealants are the gold standards. Once cured, they maintain their flexibility through freezing Massachusetts winters and humid summers. Most importantly, their rubbery, tough texture gives ants no mechanical purchase, meaning they cannot chew through a properly applied bead.
For larger gaps, such as where utility pipes, HVAC lines, or cable wires enter your home, expanding foam alone is not enough. Ants can easily tunnel through cured foam. Instead, use the three-layer method:
- Stuff the opening tightly with copper mesh (which will not rust or stain your siding).
- Fill the gap with expanding polyurethane foam to seal out drafts.
- Cap the exterior face of the foam with a thick layer of 100% silicone caulk to prevent pests from chewing into it.
Seasonal Timing for Inspection and Sealing
Timing is everything when sealing your home. The best time to inspect and seal entry points is late winter through early spring (late February through April). During this period, foraging activity begins to pick up, making it easier to trace ant paths back to their entry points. Additionally, spring temperatures are ideal for sealants to cure reliably.
A second, lighter inspection should be done in October. Wood naturally expands and contracts with summer heat and winter cold cycles, which can tear old caulk lines and open up new cracks. A quick autumn touch-up ensures your home remains secure before pests seek warm shelter for the winter.
Professional Treatment vs. DIY Sealing Mistakes
While DIY sealing is a fantastic preventive measure, it can easily go wrong if you make these common mistakes:
- Ignoring the Root Moisture Problem: Sealing an entry point without fixing the leaking gutter or rotting windowsill above it is a temporary fix. The wood will continue to decay, eventually attracting a new colony.
- Using the Wrong Caulk: Cheap acrylic latex caulk will shrink, crack, and pull away from the siding within a single season, allowing ants to return.
- Failing to Locate the Parent Nest: Simply spraying the ants you see on your kitchen counter does nothing to stop the thousands of ants waiting in the parent nest outdoors.
If you are dealing with a persistent infestation, professional intervention is often necessary. You can read about why a structured approach works in the ultimate guide to professional carpenter ant removal, or explore the capabilities of modern pest management in can pest control get rid of carpenter ants.
Average Costs of Professional Exclusion and Treatment
When considering professional pest control, many homeowners wonder about the cost. Based on publicly available internet data, the average cost for a professional carpenter ant treatment and structural exclusion program ranges from $250 to $1,000+.
Please note: This range is based on general industry data and does not represent the actual pricing of Biggins Exterminating & Pest Control.
The wide range in cost is due to several factors, including the size of the home, the severity of the infestation, and the amount of physical exclusion work required to seal the structure. If you want to learn more about what a professional treatment entails, you can read about our specialized carpenter ant service options.
Frequently Asked Questions about Carpenter Ant Prevention
Do natural repellents like cinnamon or essential oils prevent carpenter ants?
While essential oils (like peppermint, tea tree, or clove) and ground cinnamon can disrupt pheromone trails and act as temporary “speed bumps,” they do not provide long-term protection. These natural scents evaporate quickly and require constant reapplication. They will not stop a determined colony from finding a way inside if moisture-damaged wood is available. For verified pest control tips, you can review the guidelines on Carpenter ants – Canada.ca.
How quickly can a carpenter ant colony cause structural damage?
Unlike termites, which can damage a home rapidly, a new carpenter ant colony causes minimal visible damage in its first 1 to 2 years. However, by years 3 to 5, a mature colony with thousands of workers can hollow out structural studs, joists, and sills enough to compromise the safety of the building, leading to repair bills that can easily reach thousands of dollars.
Does homeowners insurance cover carpenter ant damage?
No. Homeowners insurance companies view insect infestations and the resulting wood damage as maintenance issues rather than sudden, accidental losses. Because pest prevention is considered the homeowner’s responsibility, you will have to pay for any structural repairs out of pocket.
Conclusion
Preventing carpenter ants from damaging your home requires a proactive, systematic approach. By controlling moisture, making smart landscaping adjustments, and sealing structural entry points with the right materials, you can protect your property from these destructive pests.
At Biggins Exterminating & Pest Control, we have been helping Massachusetts homeowners protect their properties for over 40 years. As a local, family-owned and operated company based in Wilmington, MA, we understand the seasonal pest pressures unique to our region. We proudly serve our neighbors in:
- Andover (01810)
- Bedford (01730)
- Billerica (01821)
- Burlington (01803)
- Lexington (02420 / 02421)
- North Reading (01864)
- Tewksbury (01876)
- Wilmington (01887)
- Woburn (01801)
We believe in providing reliable, high-quality pest control services without forcing our customers into long-term contracts. We back our work with solid warranties to ensure your complete satisfaction.
If you are tired of fighting carpenter ants on your own, let our family protect yours. Schedule a professional carpenter ant inspection with us today, and let’s keep the wood-eaters away for good!