Why Carpenter Bee Control Matters for Massachusetts Homeowners
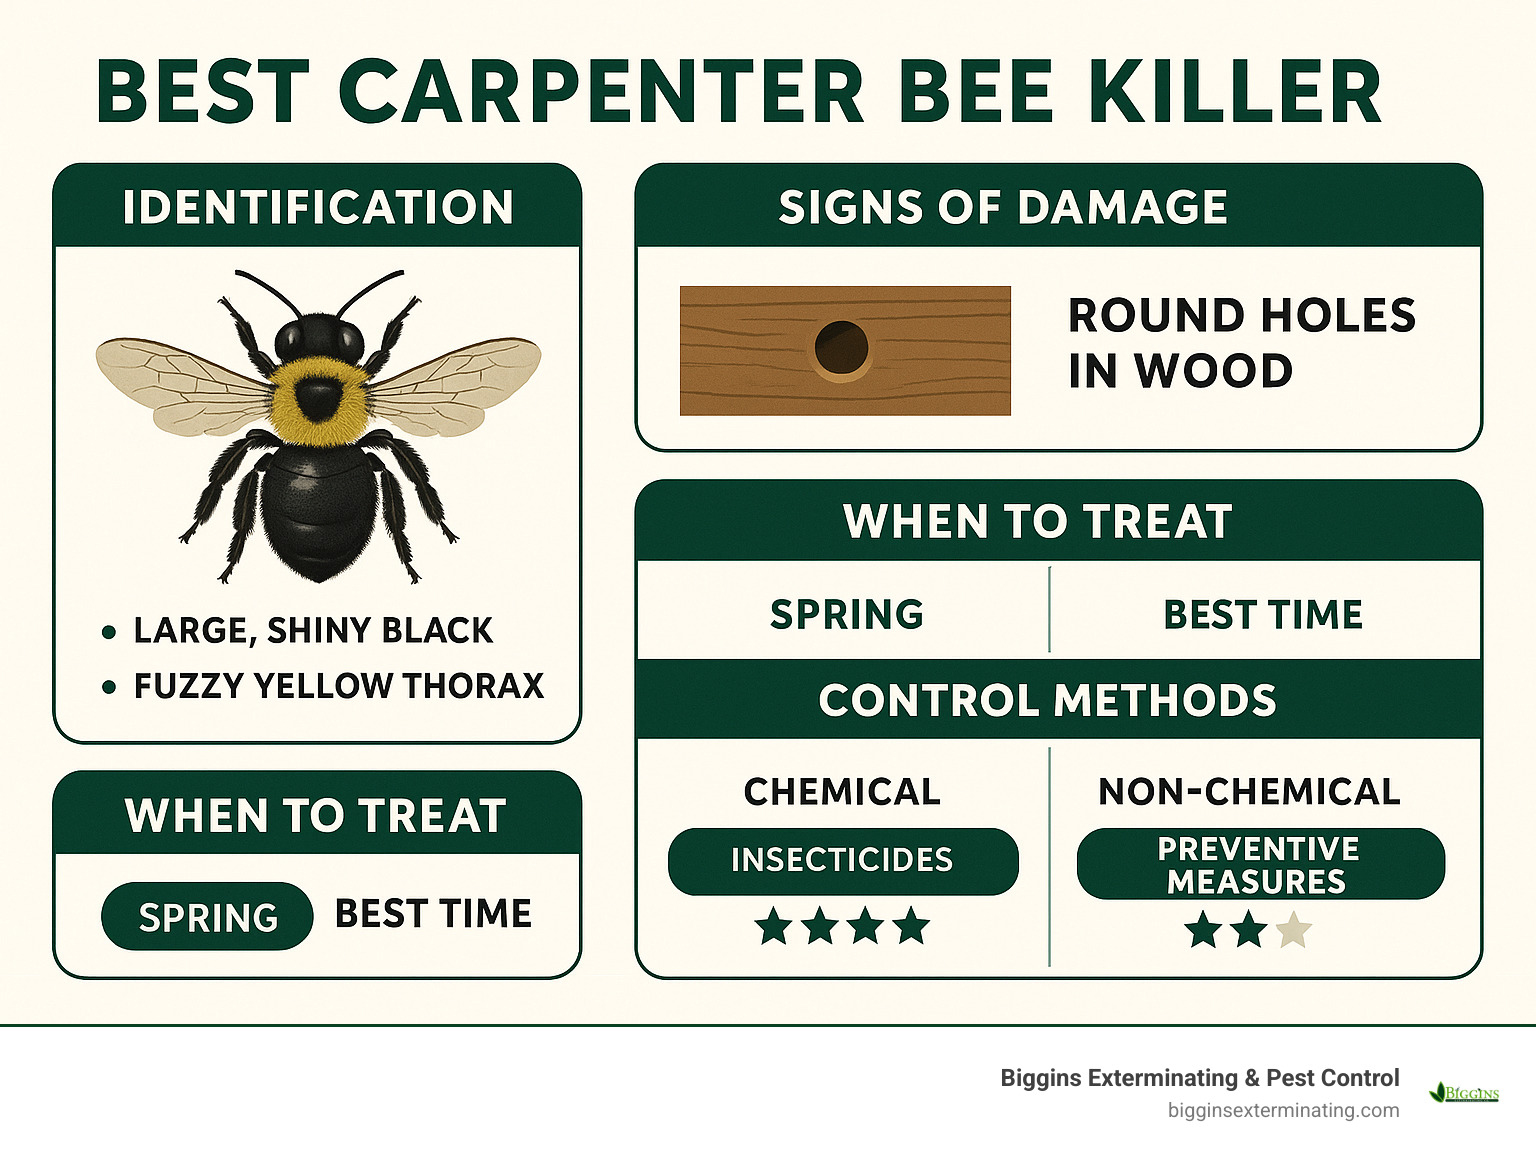
The best carpenter bee killer depends on your specific situation, but here are the top-rated options based on effectiveness and user reviews:
Chemical Solutions:
– Delta Dust (Deltamethrin) – Best for treating inside galleries, 6-month residual control
– Spectracide Carpenter Bee Foam – Ready-to-use aerosol, kills on contact, 3-month protection
– Bifen I/T Concentrate – Professional-grade bifenthrin, mix-your-own flexibility
Non-Chemical Options:
– Carpenter Bee Traps – Pesticide-free capture, reusable with pheromone lures
– Citrus Oil Sprays – Natural repellent using d-limonene from orange peels
– Preventive Wood Treatment – Annual painting and sealing of vulnerable surfaces
Spring brings more than just blooming flowers to Massachusetts – it also marks the return of carpenter bees. These large, shiny-black insects might look like harmless bumblebees, but they’re actually wood-destroying pests that can cause serious structural damage to your deck, eaves, and outdoor furniture.
Unlike termites that eat wood, carpenter bees bore perfectly round holes about the size of a nickel to create tunnels for their eggs. Over time, these galleries weaken wooden structures and attract woodpeckers that cause even more damage while hunting for bee larvae.
I’m Stephen Biggins from Biggins Exterminating & Pest Control, and I’ve been helping Massachusetts families deal with carpenter bee infestations for over 40 years. Through decades of hands-on experience, I’ve tested and refined the best carpenter bee killer strategies that balance effectiveness with environmental responsibility.
Key best carpenter bee killer vocabulary:
– carpenter bees under siding
– carpenter bees wood siding
– how to get rid of wood boring bees
Carpenter Bee 101: Biology, Damage & Detection
Before choosing the best carpenter bee killer for your situation, let’s get familiar with these fascinating yet frustrating insects. Carpenter bees are the largest native bee species in the United States, measuring anywhere from ¼ to a full inch in length.
Here’s the easiest way to tell them apart: carpenter bees have shiny, black abdomens that gleam in the sunlight, while bumblebees are completely covered in fuzzy hair with distinctive yellow stripes.
Unlike busy honeybee communities, carpenter bees are solitary. Female carpenter bees work alone, boring perfectly round holes through soft wood surfaces to create individual nurseries for their eggs. They’re particularly drawn to unpainted, weathered wood – your deck railings, eaves, windowsills, and outdoor furniture.
When carpenter bees move into your property, they leave behind obvious calling cards. You’ll notice perfectly round holes about the size of a nickel, often accompanied by small piles of sawdust (called frass) scattered beneath the holes.
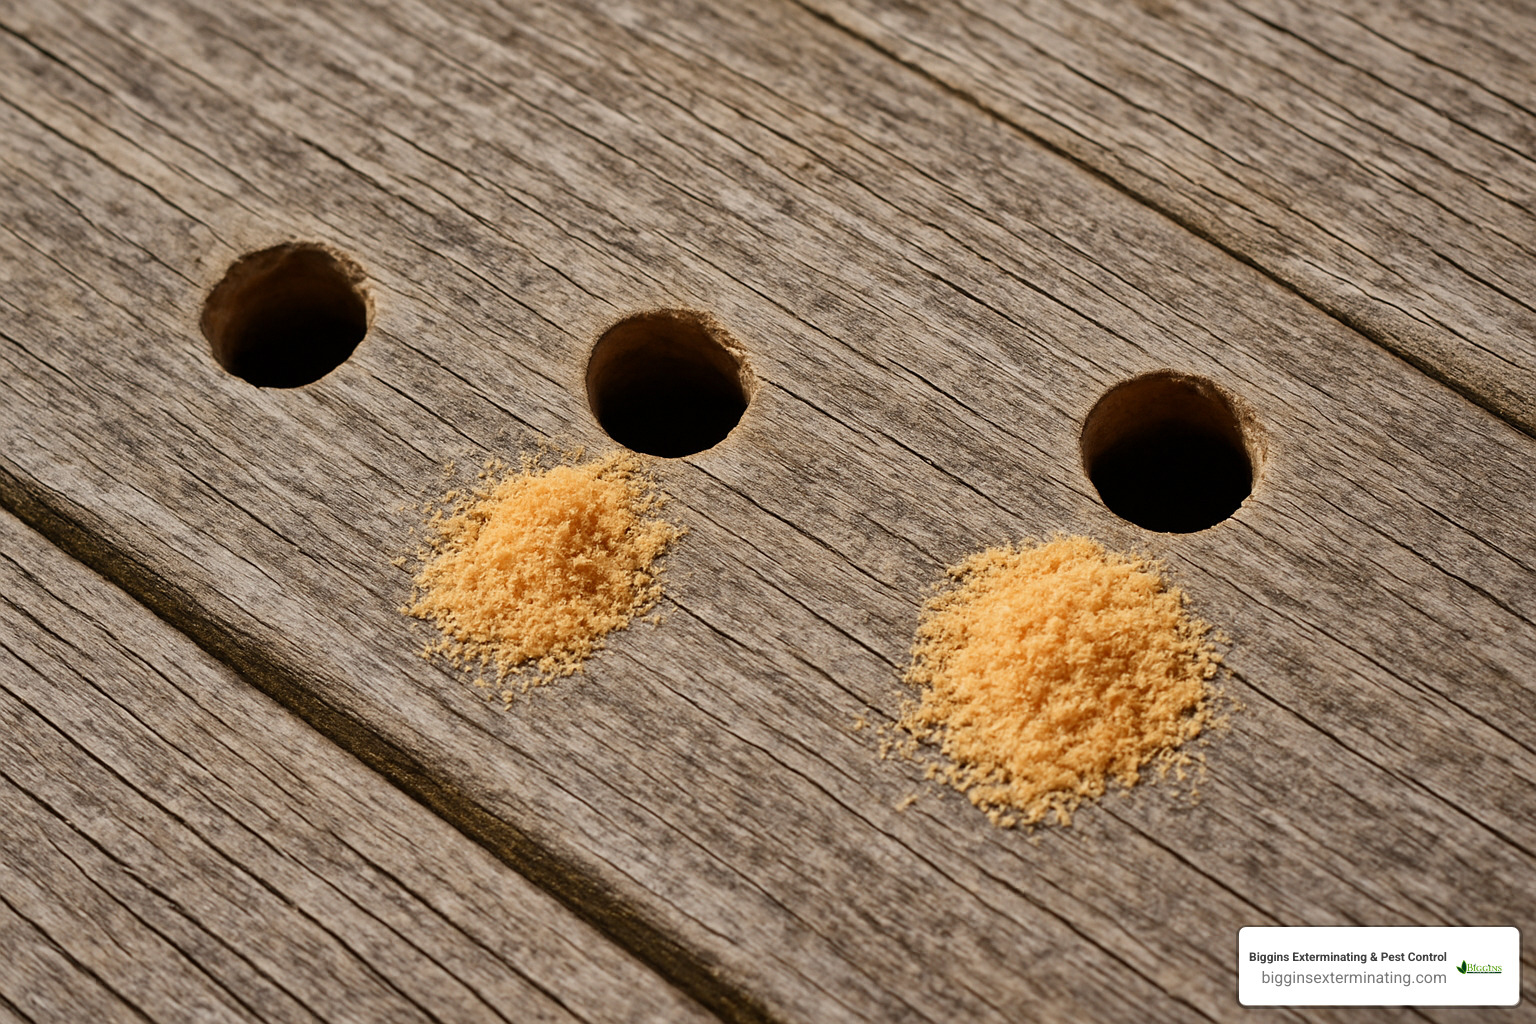
Other telltale signs include yellow pollen or bee excrement near the hole entrances, and that distinctive buzzing sound coming from inside the wood. If you peek inside the holes, you might see the partitioned galleries where the female bee has created separate chambers for each egg.
What makes these bees particularly challenging is their homing instinct. Female carpenter bees often return to the same holes where they were born, expanding existing tunnels and making the galleries longer each year.
Carpenter bees are actually “buzz pollinators” – they grab onto flowers and vibrate their flight muscles to shake pollen loose. This special technique makes them incredibly valuable for pollinating crops like tomatoes and blueberries. You can learn more about this fascinating behavior in this scientific research on buzz pollinators.
Nature provides some help in the form of tiger bee flies – these parasitic insects lay their eggs in carpenter bee galleries. While they provide some natural control, they’re rarely numerous enough to prevent significant infestations.
Understanding carpenter bee behavior helps you choose the most effective treatment strategy. For a deeper dive into identifying and managing these wood-boring insects, check out our comprehensive guide on Wood Boring Bee removal.
Best Carpenter Bee Killer Options Reviewed
After four decades of helping Massachusetts families battle carpenter bee infestations, I’ve learned that the best carpenter bee killer isn’t always the most expensive or most advertised product. Success comes from understanding which tool works best for each specific situation.
Contact sprays knock down visible bees, but won’t reach larvae deep inside galleries. Residual foams provide longer-lasting protection, while insecticidal dusts penetrate into hard-to-reach tunnels where real damage happens.
The most effective active ingredients include deltamethrin, bifenthrin, and permethrin. These pyrethroids are effective against carpenter bees while being relatively safe for families when used properly.
Chemical Dusts & Foams – Best Carpenter Bee Killer Inside Galleries
When carpenter bees have already started their tunneling operation, deltamethrin dust becomes your secret weapon. Delta Dust penetrates those tunnels like nothing else can. The fine particles cling to bee bodies and tunnel walls, creating a 6-month residual barrier that keeps working long after application.
The bees actually help spread the treatment – they carry the dust deeper into their galleries, reaching larvae that sprays could never touch.
Application is simple with the right applicator wands. You just puff the dust into each gallery entrance, and physics does the rest. The particles float through the tunnels, coating every surface the bees might contact.
Foaming aerosols offer another excellent approach for gallery treatment. The foam expands to fill tunnels completely, ensuring contact with all life stages. Foam holds its position in the gallery, providing extended contact time. Most quality foams give you about 3 months of protection, which covers the critical spring emergence period.
Ready-to-Use & Concentrate Sprays – Best Carpenter Bee Killer for Surface Protection
For surface protection and immediate knockdown, sprays give you flexibility to treat large areas quickly. Ready-to-use formulations with permethrin at 0.5% concentration provide excellent efficacy without mixing hassle.
The real workhorses are concentrate sprays with bifenthrin at 7.9% concentration. These professional-grade products let you adjust dilution rates based on your specific needs.
Hose-end convenience makes these concentrates particularly appealing for treating large deck areas or multiple building faces. You can cover extensive square footage in minutes.
Sprays offer versatility. You can treat gallery entrances, spray preventively on vulnerable wood surfaces, and knock down aggressive males. Early morning applications work best, when bees are less active.
Carpenter Bee Traps & Physical Controls
Sometimes the best carpenter bee killer doesn’t kill at all – it just removes problem bees from your property. Carpenter bee traps work on pure bee psychology.
The basic wood block trap design hasn’t changed much because it works. Male carpenter bees are incredibly territorial. When they see what looks like another bee’s tunnel, they investigate aggressively. The angled hole leads them into a funnel bottle where they become trapped.
Placement tips make all the difference. Position them 4-6 feet off the ground, preferably under eaves where bees naturally patrol.
Here’s a professional secret: reuse lure scent by leaving a few dead bees in the collection bottle. The pheromones attract more bees, creating a cycle that can dramatically reduce local populations.
Natural & Bee-Friendly Alternatives
For families concerned about chemical use, several natural approaches show real promise. Citrus oil containing d-limonene has surprised me with its effectiveness.
Almond oil works as a repellent rather than a killer, but prevention is often the best cure. The strong scent deters females from boring new holes.
I’ve had customers swear by fake wasp nests hung under eaves. Carpenter bees avoid areas where they think wasps might be nesting.
The most effective natural approach combines multiple strategies with good maintenance. Annual hardwood paint application makes wood surfaces less attractive to boring bees.
For comprehensive information about integrated approaches that balance effectiveness with environmental responsibility, visit our Carpenter Bees Pest Control page.
Safe Selection & Application Guide
Choosing the best carpenter bee killer isn’t just about effectiveness – it’s about protecting your family, pets, and the environment while getting the job done right. The safest approach is often the most effective one too.
Reading product labels is essential. Every carpenter bee killer has specific instructions for mixing, application rates, and safety precautions that ensure both your safety and the product’s effectiveness.
Personal protective equipment should never be optional. Long sleeves and pants prevent skin contact, while safety glasses protect your eyes from spray drift. When applying dusts or concentrates, a respirator mask becomes crucial. Chemical-resistant gloves and closed-toe shoes complete your safety gear.
Timing makes a huge difference in both safety and results. Early morning or late evening are ideal because carpenter bees are less active. You’ll also get better product contact when bees aren’t buzzing around the treatment area. Avoid windy days entirely.
Weather matters more than most homeowners realize. Rain within 24 hours can wash away your treatment before it works. High humidity slows drying times, which affects when it’s safe for family and pets to return to treated areas.
Pet safety requires special attention, particularly with cats. Most carpenter bee killers are safe once surfaces dry completely, but cats are especially sensitive to permethrin-based products. Remove all pets during application and wait at least two hours before allowing them back.
Children should stay indoors during treatment and until surfaces are completely dry. Store all pest control products in their original containers, in locked cabinets, away from curious hands.
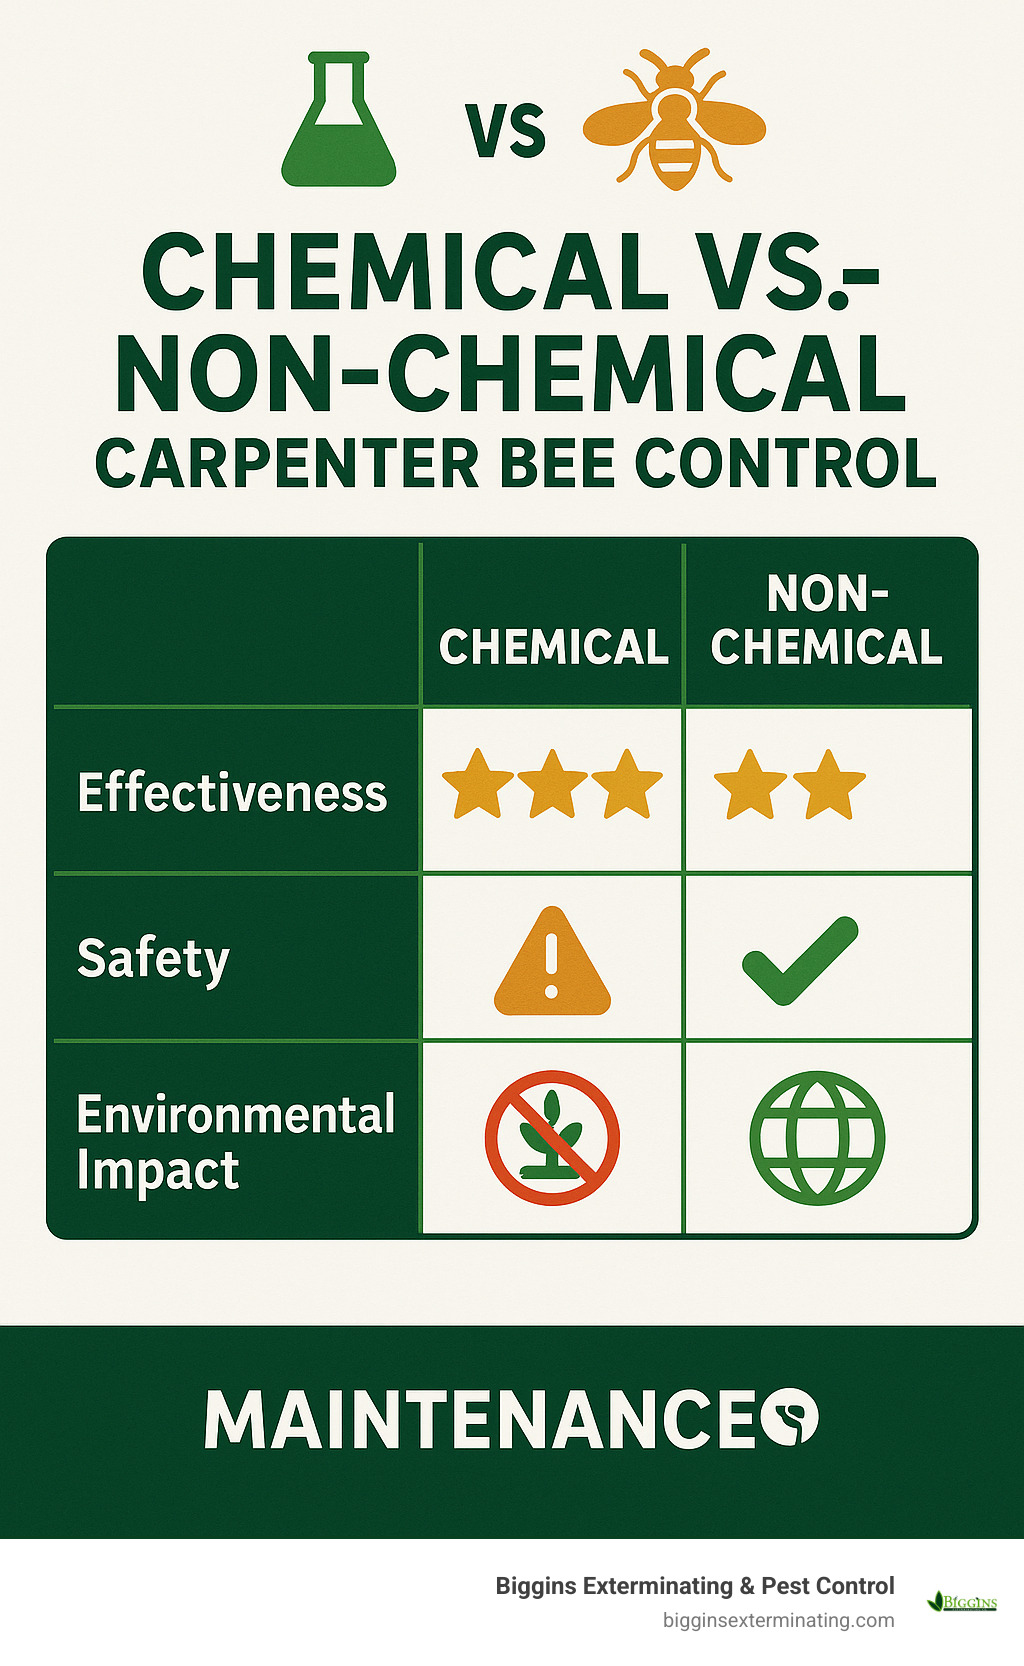
Environmental stewardship starts with trying the least harmful methods first. Carpenter bee traps, citrus oil repellents, and preventive wood treatments often solve problems without chemical intervention. When chemicals become necessary, targeted applications work better than broad-area treatments.
Preventing runoff protects both your property and local waterways. Apply only to the point of slight surface moisture – more isn’t better. Consider property slope and upcoming weather when planning treatments.
Pollinator protection is everyone’s responsibility. Treat only specific areas where carpenter bees are active, not entire structures. During peak blooming periods, consider trap-based methods instead of sprays.
The most successful programs combine multiple approaches thoughtfully. Start with inspection to identify active galleries, then choose the most appropriate treatment method for each situation.
For detailed guidance on implementing safe, effective carpenter bee control strategies that protect both your property and the environment, check out our Carpenter Bees Control resource page.
Wood Repair & Long-Term Prevention
Finding the best carpenter bee killer is only half the battle – proper wood repair and prevention keep these persistent insects from returning year after year. I’ve seen countless homeowners successfully eliminate carpenter bees, only to face the same problem the following spring because they skipped this crucial step.
The biggest mistake people make is sealing holes too quickly. You need to ensure all bees are gone before trapping them inside their galleries. Live bees sealed inside will just bore new exit holes, often causing more damage.
Wait 2-3 weeks after treatment before permanently sealing any holes. This gives stragglers time to emerge and ensures your repair work will last.
When ready to seal, wood putty or exterior-grade caulk works well for most situations. For extra protection, stuff a small piece of steel wool into each hole before applying filler. The abrasive material makes it much harder for bees to re-bore through repairs.
Sand everything smooth once dry, then apply matching paint or stain. If dealing with ongoing problems, consider using borate-treated wood fillers – they provide long-term protection against both insects and rot.
The real secret to long-term success is understanding what attracts carpenter bees. These insects strongly prefer unpainted, weathered softwood. Fresh paint acts like a natural deterrent.
Annual painting or staining of vulnerable areas is your best defense. Focus on deck railings, roof eaves, window trim, and any exposed wood ends. It’s far easier than dealing with new infestations every spring.
Wood selection makes a huge difference. If replacing damaged boards or building new structures, choose hardwoods like oak or maple whenever possible. Carpenter bees much prefer soft pine and cedar.
For existing softwood structures, metal flashing or wire mesh over timber ends provides excellent protection. This is especially important for deck posts and beam ends where boring typically starts.
Your yearly inspection routine should start in March when overwintering bees become active. Look for fresh sawdust, new holes, or buzzing sounds from existing galleries. Catching problems early makes treatment much more effective.
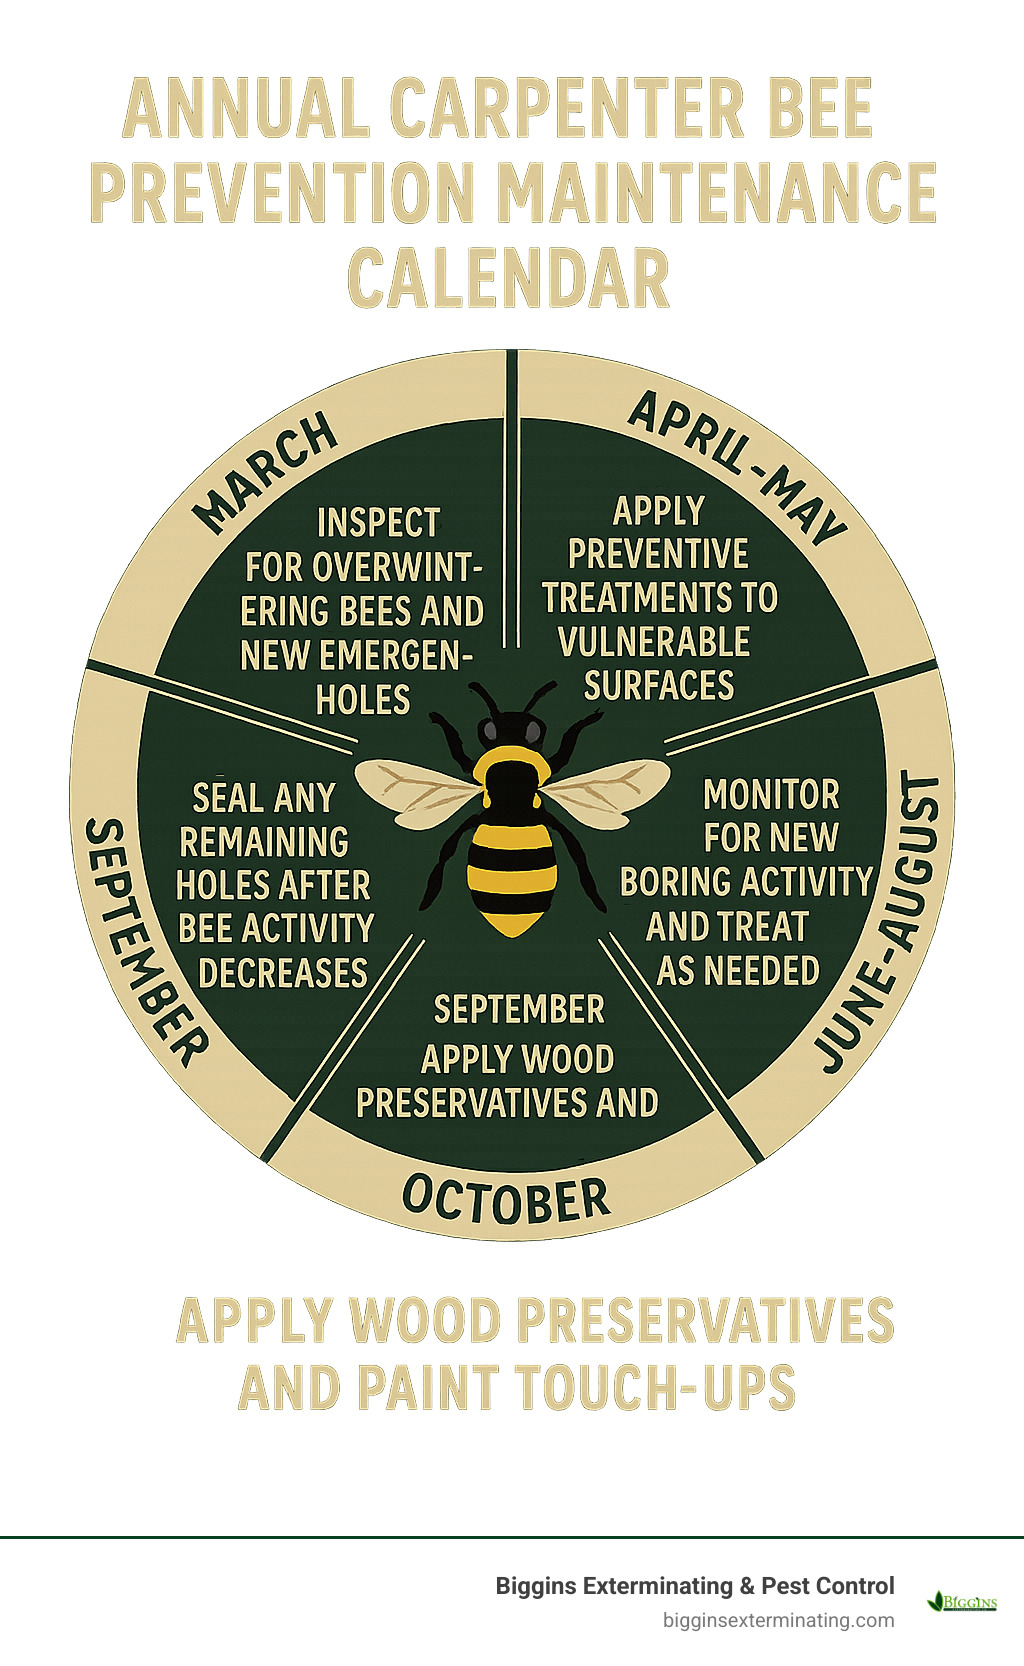
Spring is inspection time – March is perfect for checking overwintering sites. April and May are ideal for applying preventive treatments before peak boring season begins.
Summer months require ongoing monitoring. New holes can appear quickly during peak activity periods.
Fall cleanup in September and October is when you seal remaining holes and apply fresh wood preservatives. This timing ensures bees have finished their annual cycle.
The integrated approach works best – combining proper wood maintenance, regular inspections, and targeted treatments when needed. Homeowners who follow this routine typically see 80-90% fewer carpenter bee problems compared to those who just react to infestations.
Carpenter bees are creatures of habit. They return to the same locations year after year, often using the same galleries their mothers used. Breaking this cycle through proper repair and prevention is the key to long-term success with any best carpenter bee killer strategy.
Frequently Asked Questions about Carpenter Bee Killers
Do I need to seal the holes after treatment?
Yes, absolutely – but timing makes all the difference between success and frustration. I’ve seen too many homeowners seal holes immediately after spraying, only to find new holes appearing nearby a week later. Those trapped bees don’t just give up; they bore right back out.
Wait at least 2-3 weeks after treatment before sealing any galleries. This gives eliminated bees time to decompose and allows any surviving bees to emerge and contact the residual insecticide. It’s tempting to seal immediately for that “finished” look, but patience pays off here.
When you’re ready to seal, silicone-based caulk works much better than latex. Bees can actually chew through softer latex caulk – I’ve witnessed this during follow-up inspections. For larger galleries, stuff some steel wool into the hole before caulking. The abrasive material creates an extra barrier that deters future boring attempts.
Sand the dried caulk smooth and apply matching paint or stain. This final step isn’t just cosmetic – fresh paint actually helps repel carpenter bees from the area in future seasons.
When should I call a professional exterminator?
After four decades in pest control, I’ve learned that some situations are perfect for DIY treatment, while others really benefit from professional expertise. Call a professional when the infestation covers multiple structures or when you’re dealing with galleries 15+ feet off the ground.
Height and safety concerns top the list of reasons to call us. Carpenter bees love roof eaves and high deck railings – exactly the places where ladder work becomes dangerous. We have the proper equipment and insurance to handle these challenging locations safely.
If you’ve tried DIY treatments 2-3 times without success, there’s usually an underlying issue that professional eyes can spot quickly. Sometimes it’s missed galleries, sometimes it’s a timing problem, and occasionally it’s a species identification issue.
Woodpecker damage often signals the need for professional help. When carpenter bee larvae attract woodpeckers, you’re dealing with both structural damage and a secondary pest problem. These situations require coordinated treatment strategies that go beyond simple bee elimination.
At Biggins Exterminating & Pest Control, we offer contract-free services with warranties. Many homeowners find that professional treatment costs less than multiple DIY attempts, especially when you factor in the time and materials involved.
Will these products harm honeybees or butterflies?
This question comes up constantly, and I appreciate homeowners who think about beneficial insects. The honest answer is that most carpenter bee killers can affect other pollinators if they come into direct contact – but smart application techniques minimize this risk dramatically.
Dust applications inside galleries pose the lowest risk to beneficial insects. The product stays contained within the carpenter bee tunnels, where honeybees and butterflies simply don’t go. Surface sprays carry higher risk because they can contact visiting pollinators.
Timing your treatments makes a huge difference. Apply products during early morning or late evening when beneficial insects are less active. Avoid treating during peak flower blooming periods when pollinator activity is highest.
Targeted applications beat broad-area treatments every time. Treat only the affected wood surfaces rather than spraying entire structures. This approach provides effective carpenter bee control while protecting the beneficial insects your garden needs.
Natural alternatives like citrus oil sprays offer excellent carpenter bee repellency with minimal impact on other insects. These products work especially well for prevention rather than active infestations.
The best carpenter bee killer for your situation depends on balancing effectiveness with environmental responsibility. When in doubt, start with the least harmful option that will still solve your problem. Professional consultation can help you choose the most appropriate treatment strategy for your specific circumstances.
Conclusion & CTA
After testing countless products over four decades in the pest control business, I can tell you that finding the best carpenter bee killer isn’t about choosing one magic solution – it’s about understanding your specific situation and creating a comprehensive plan.
The most effective approach follows what we call the “four pillars” of carpenter bee control: inspect → kill → seal → maintain. Skip any one of these steps, and you’ll likely find yourself dealing with the same problem next spring.
Start with a thorough inspection to identify every active gallery and assess how severe your infestation really is. Look for those telltale round holes, sawdust piles, and buzzing sounds.
Choose your treatment method based on what you’ve found. Chemical dusts work best for getting deep into galleries. Surface sprays provide excellent protection for vulnerable wood. Traps offer a pesticide-free option. Natural alternatives like citrus oil can be surprisingly effective for homeowners who prefer to avoid chemicals entirely.
Repair and seal the damage after you’re sure the bees are gone. This step is crucial – leaving holes open is like hanging a “vacancy” sign for next year’s carpenter bees. Use quality wood filler and don’t forget to paint or stain the repaired areas.
Maintain your protection with annual inspections and preventive treatments. Fresh paint is one of the best deterrents, and a yearly walk-around in early spring can catch problems before they become expensive headaches.
Based on internet research, DIY carpenter bee control typically costs between $15-$90 for chemical treatments, though prices can range much higher for comprehensive approaches or severe infestations. These are general market estimates and not specific to our services at Biggins Exterminating.
Here’s the thing about carpenter bee control – family safety should always come first. While most products are relatively safe when used properly, working with pesticides and climbing ladders to reach high eaves isn’t for everyone. There’s no shame in calling for professional help, especially when dealing with multiple structures or hard-to-reach areas.
At Biggins Exterminating & Pest Control, we’ve been helping Massachusetts families solve carpenter bee problems since the 1980s. What sets us apart is our no-contract approach – you get expert service and warranties without being locked into long-term agreements.
Whether you tackle this project yourself or bring in professionals, the most important thing is taking action early. Carpenter bees are creatures of habit – they return to the same spots year after year, and what starts as a few holes can quickly become serious structural damage if left untreated.
We serve homeowners throughout Andover, Bedford, Billerica, Burlington, Lexington, North Reading, Tewksbury, Wilmington, and Woburn. If you’d like personalized advice on the best carpenter bee killer for your specific situation, or if you want to schedule an inspection, we’re always happy to help a fellow Massachusetts homeowner protect their property.
Visit our carpenter bee services page to learn more about our comprehensive approach, or give us a call for a free consultation. The best time to deal with carpenter bees is right now – before they turn your deck into Swiss cheese.
